Growing up, I never imagined I’d one day be painting tiles in my apartment. Tiles seemed like such a permanent fixture – something you choose once and live with forever. But life has taught me that even ceramic tiles can be changed, and not necessarily by ripping them all out.
Painting tiles is a budget-friendly way to update your space without the hassle of a full renovation or unnecessary expenses. And the best part? Manufacturers have recently developed wear-resistant formulas that can withstand moisture and last for years!
In this article, I’ll walk you through the best tile paints and share some tried-and-true application techniques that hold up even in high-moisture areas.
Can I Paint Tiles?
Yes, you can paint tiles! Keep in mind, though, it’s a temporary solution. The paint will wear off over time, especially in high-traffic areas. If you’re not ready for a complete tile replacement yet, painting can be a great alternative that’ll last for months or even years.
The technical side is quite fascinating. Ceramic and porcelain tiles have an extremely dense structure – they absorb less than 3% moisture. This makes it tricky for paint to get a good grip on the surface.
It’s like trying to stick something to glass – pretty much the same challenge. That’s why you need special paint for different surfaces and proper surface prep for successful results.
Just keep in mind that it won’t look exactly like factory-made tiles – colors created through firing are naturally brighter and more vibrant. But with the right approach, painting can transform your space and breathe new life into old tiles.
Why Should I Paint Tiles?
Cost & Time
The biggest draw is obviously the cost savings. For about $100 and half a day’s work, you can give your tiles a decent makeover that’ll last a while. Sure, it’s not the fanciest solution, but it’s definitely worth considering!
Temporary & Easy Fix
This method shines when you’re planning a major renovation but want a quick refresh right now. Trust me – living with a design you’re sick of can really get to you, and painting offers a quick way out.
I often suggest this to friends who aren’t up for a big renovation project. Painting tiles is perfect since you don’t have to mess with removing fixtures, renting tile cutters, or finding a professional tiler.
What to Expect
source
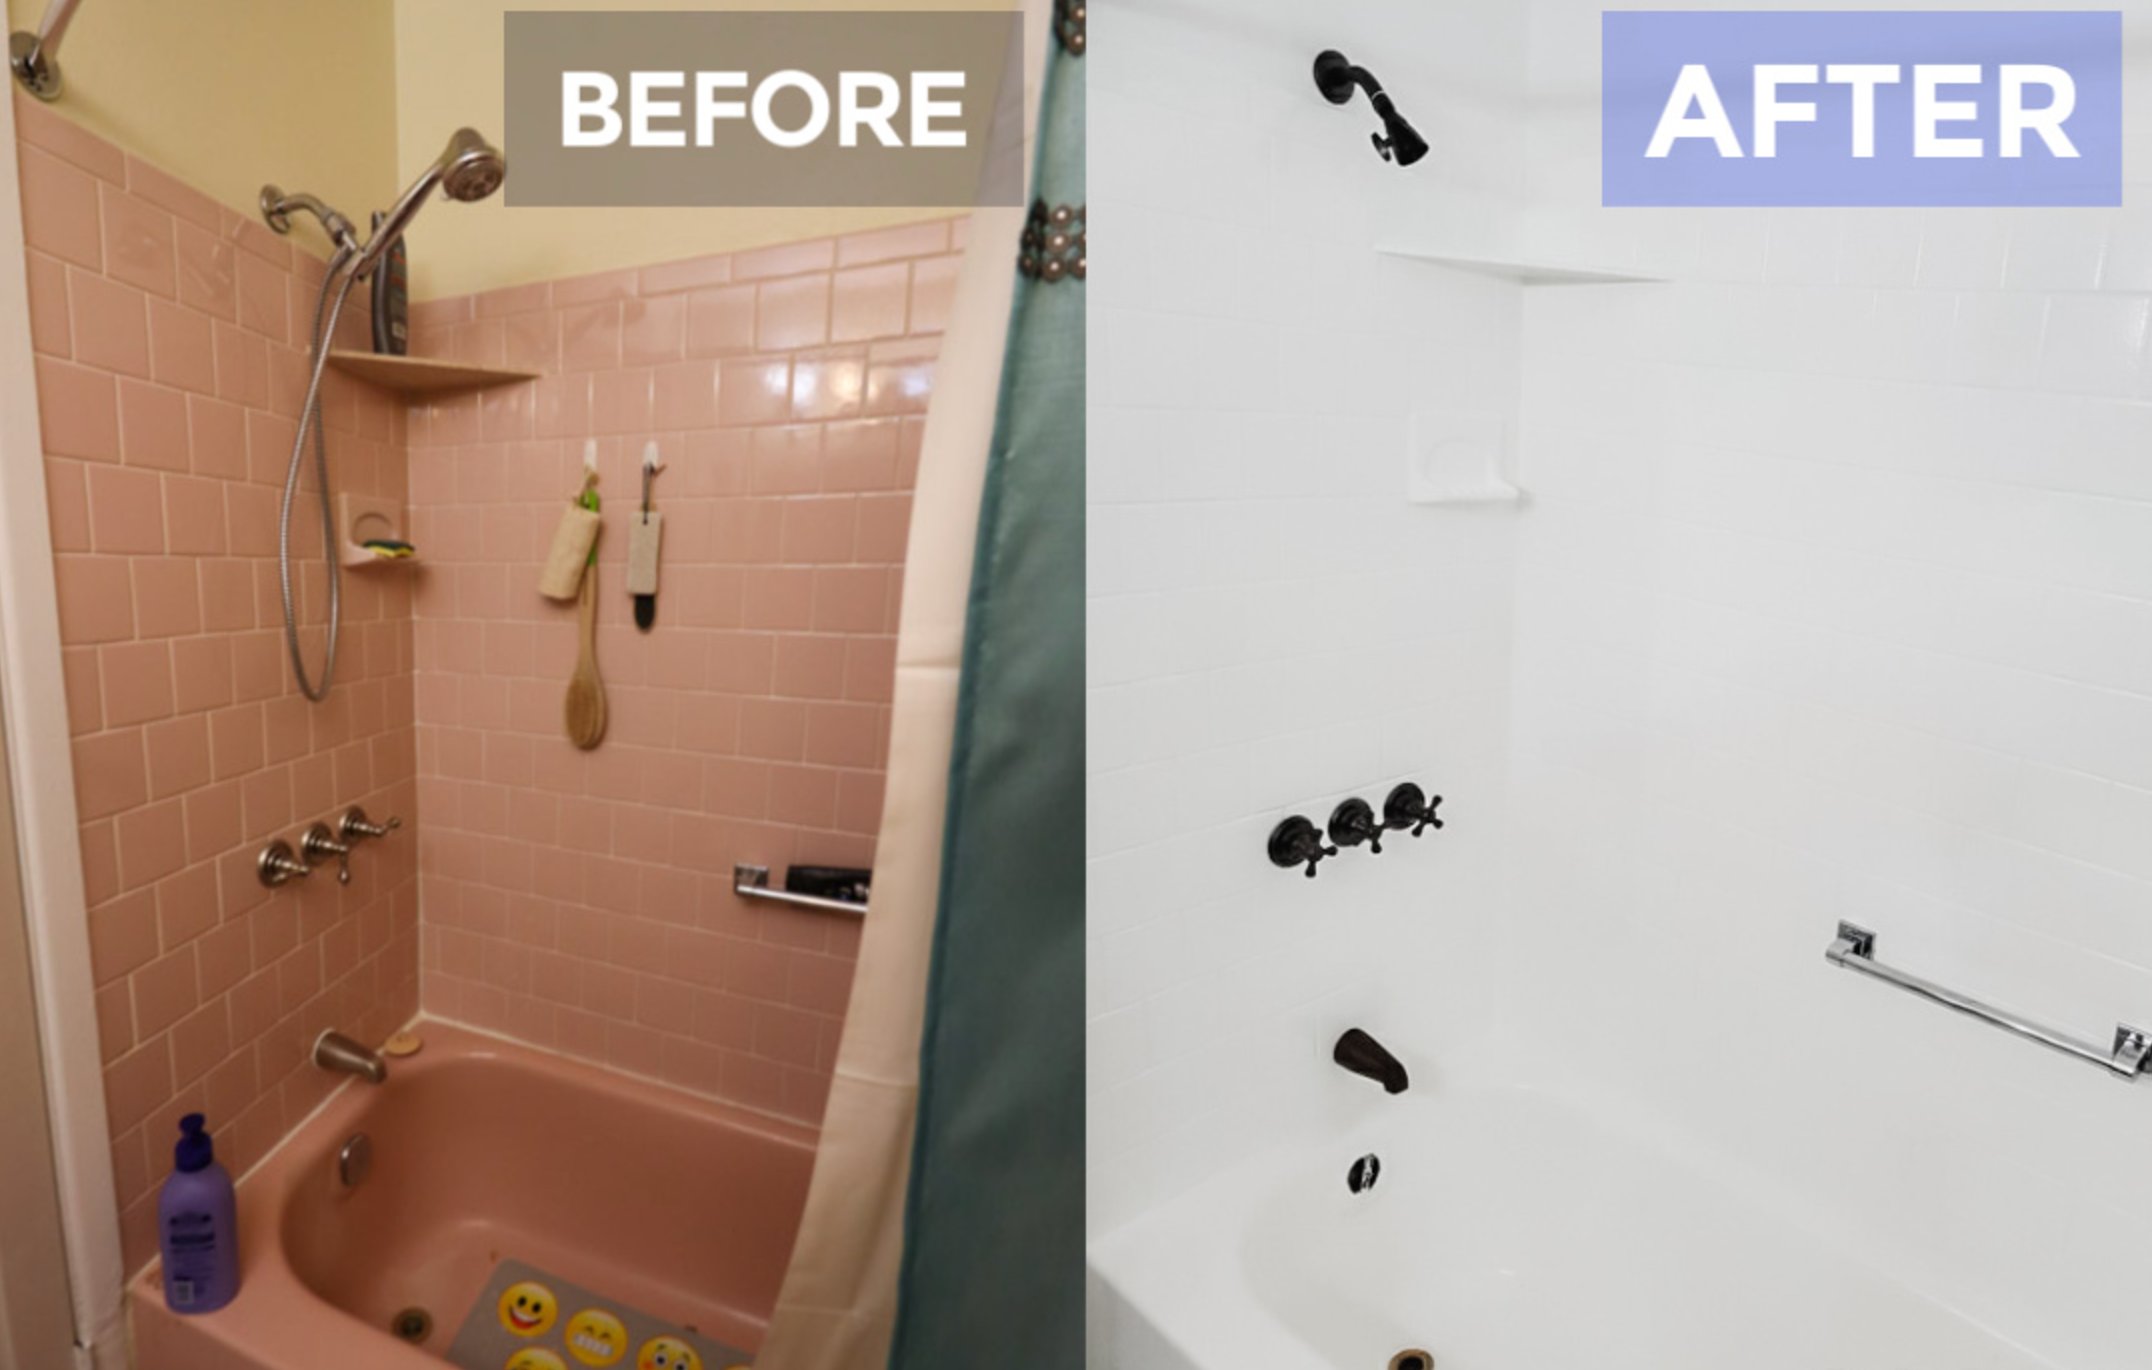
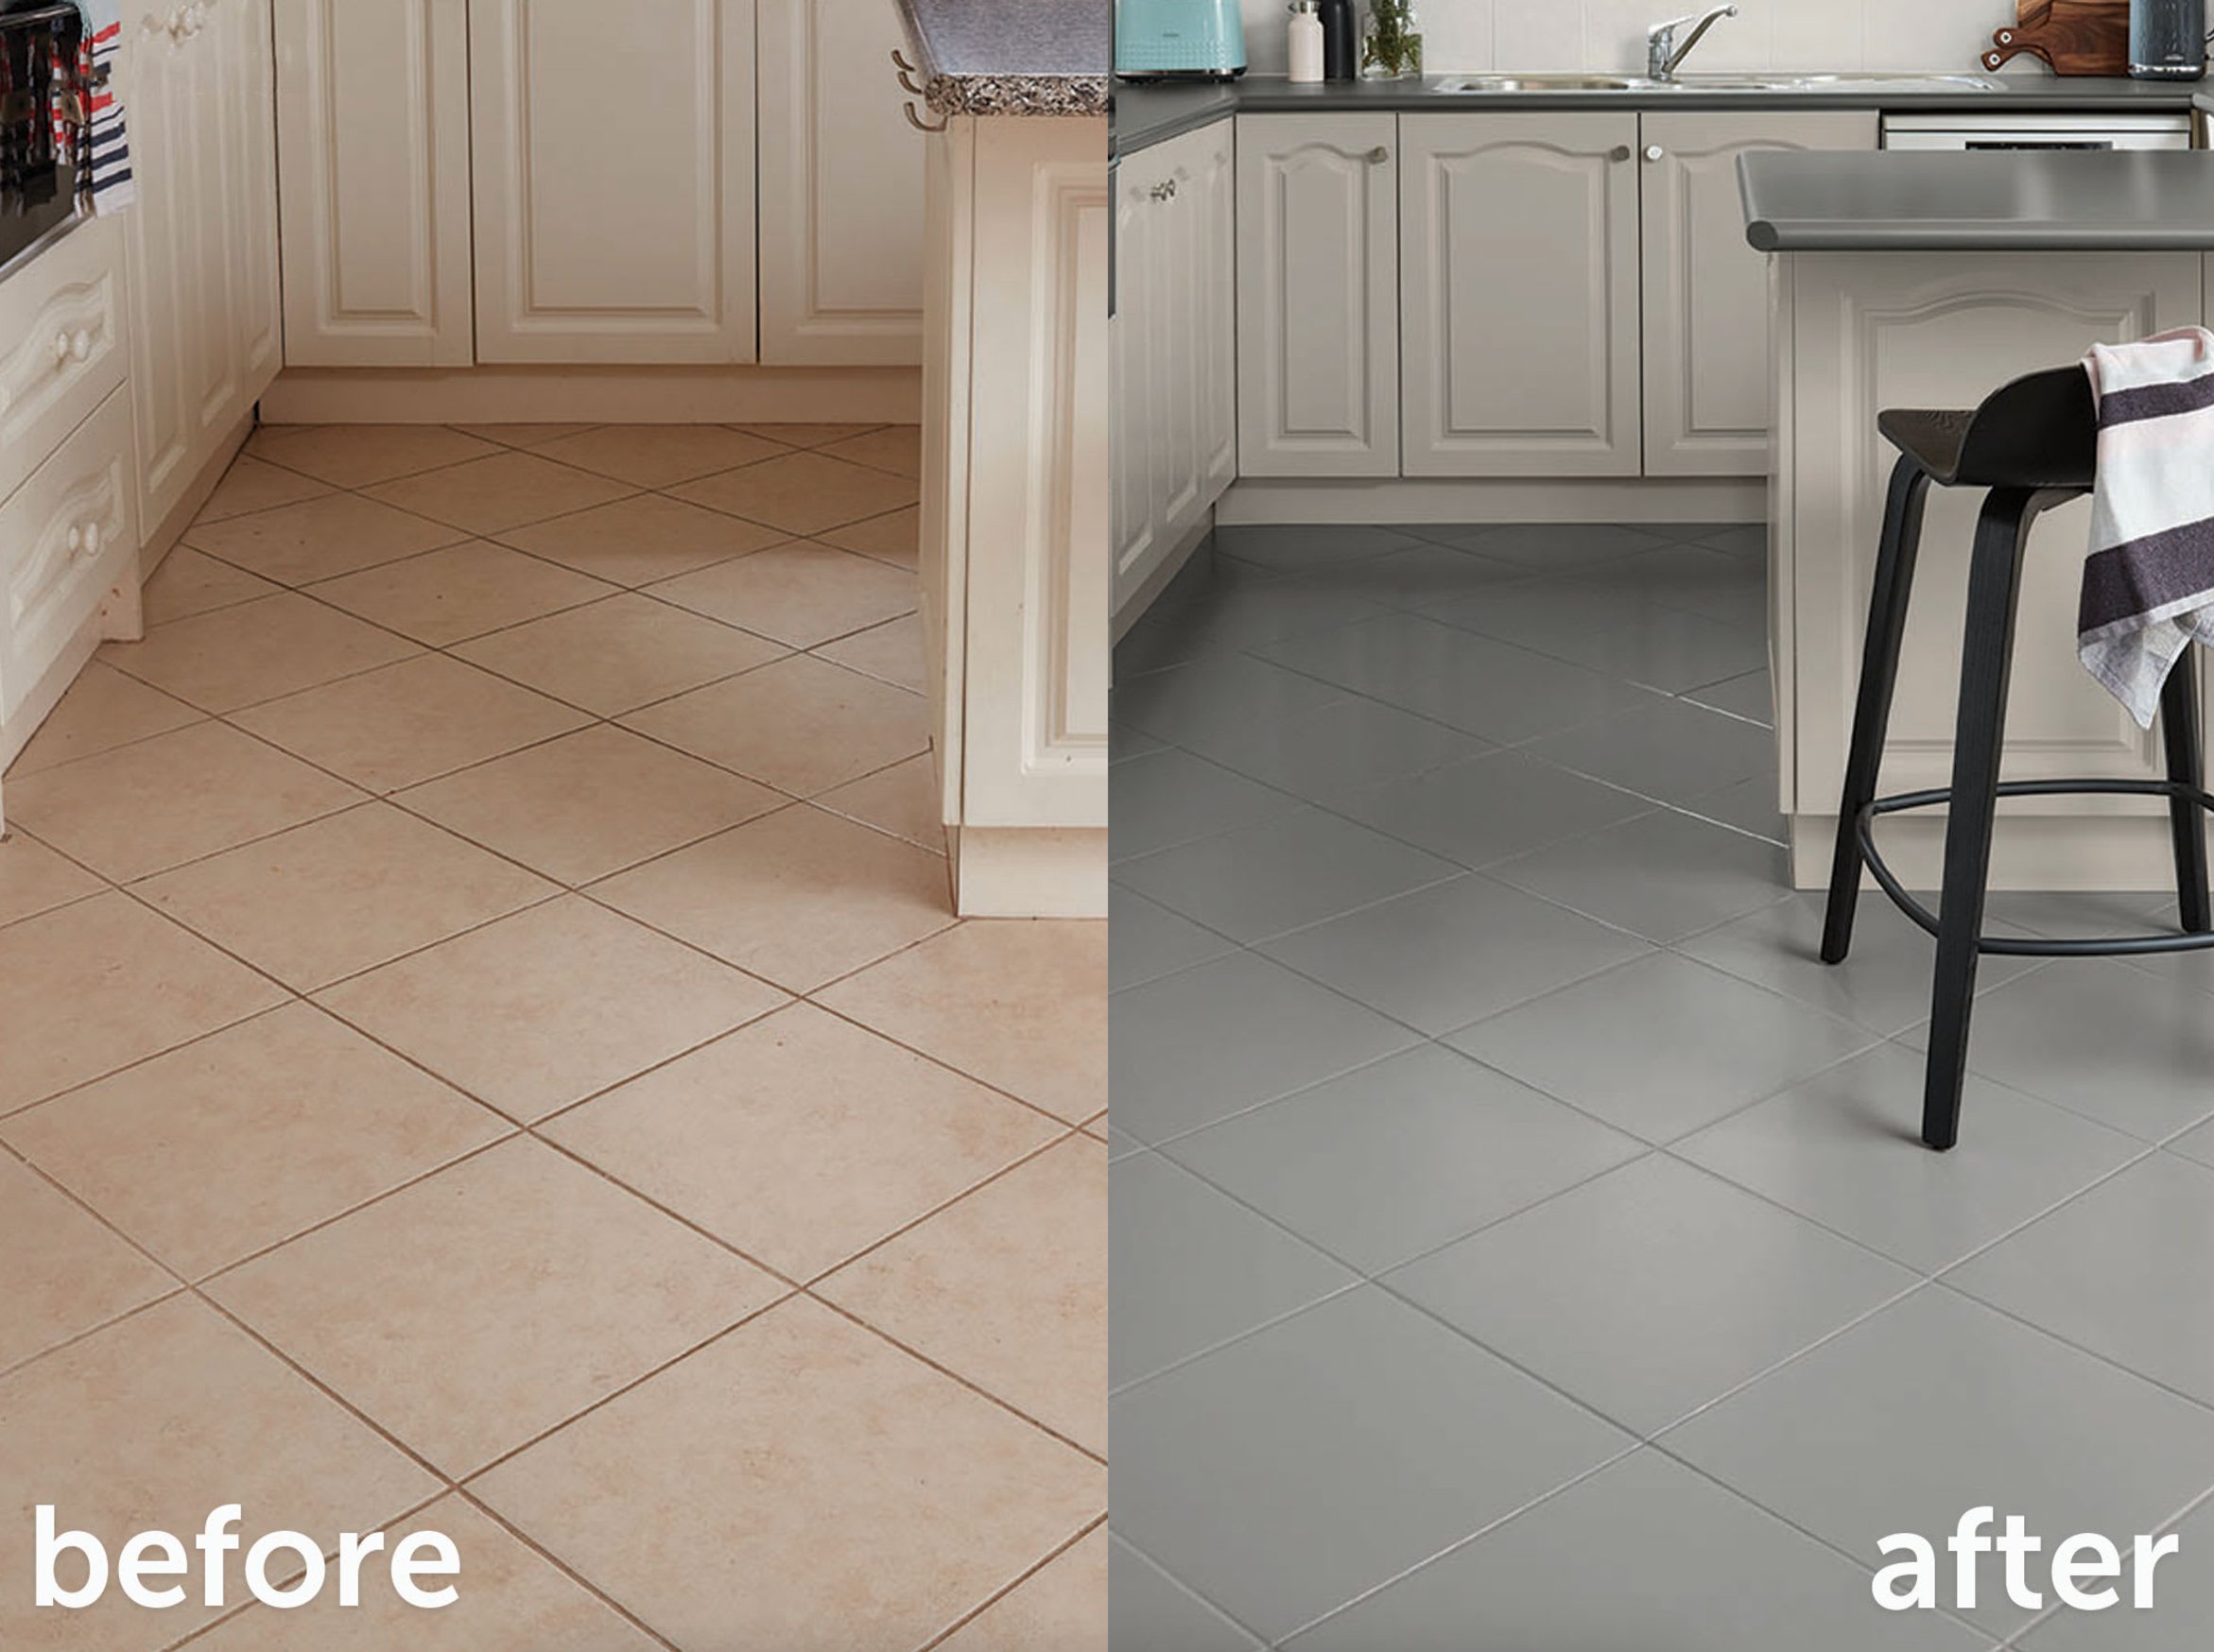
If done right, painted tiles can look great for several years. Sure, high-traffic areas might see some fading over time, and the grout lines won’t be as prominent.
But here’s the good news – you can easily touch up the paint whenever needed. Just add a fresh coat, and you’re good to go.
What’s the Best Primer for Tiles?
Don’t skimp on tile primer – without a solid base, your paint won’t stick around for long. This is especially crucial if you paint tiles in a shower or bathroom with constant moisture.

I swear by Zinsser Bulls Eye 1-2-3 for all my DIY projects, and it hasn’t let me down yet. It’s this awesome water-based primer that somehow sticks to everything. The first time I used it on glossy tiles, I was amazed – no endless sanding needed!
One of the best things about Bulls Eye is its mold protection. That’s a huge plus for bathrooms. It also dries super quick – touchable in 30 minutes and ready for paint in an hour. One coat usually does the trick for a smooth finish. You can grab it on Amazon for a decent price.
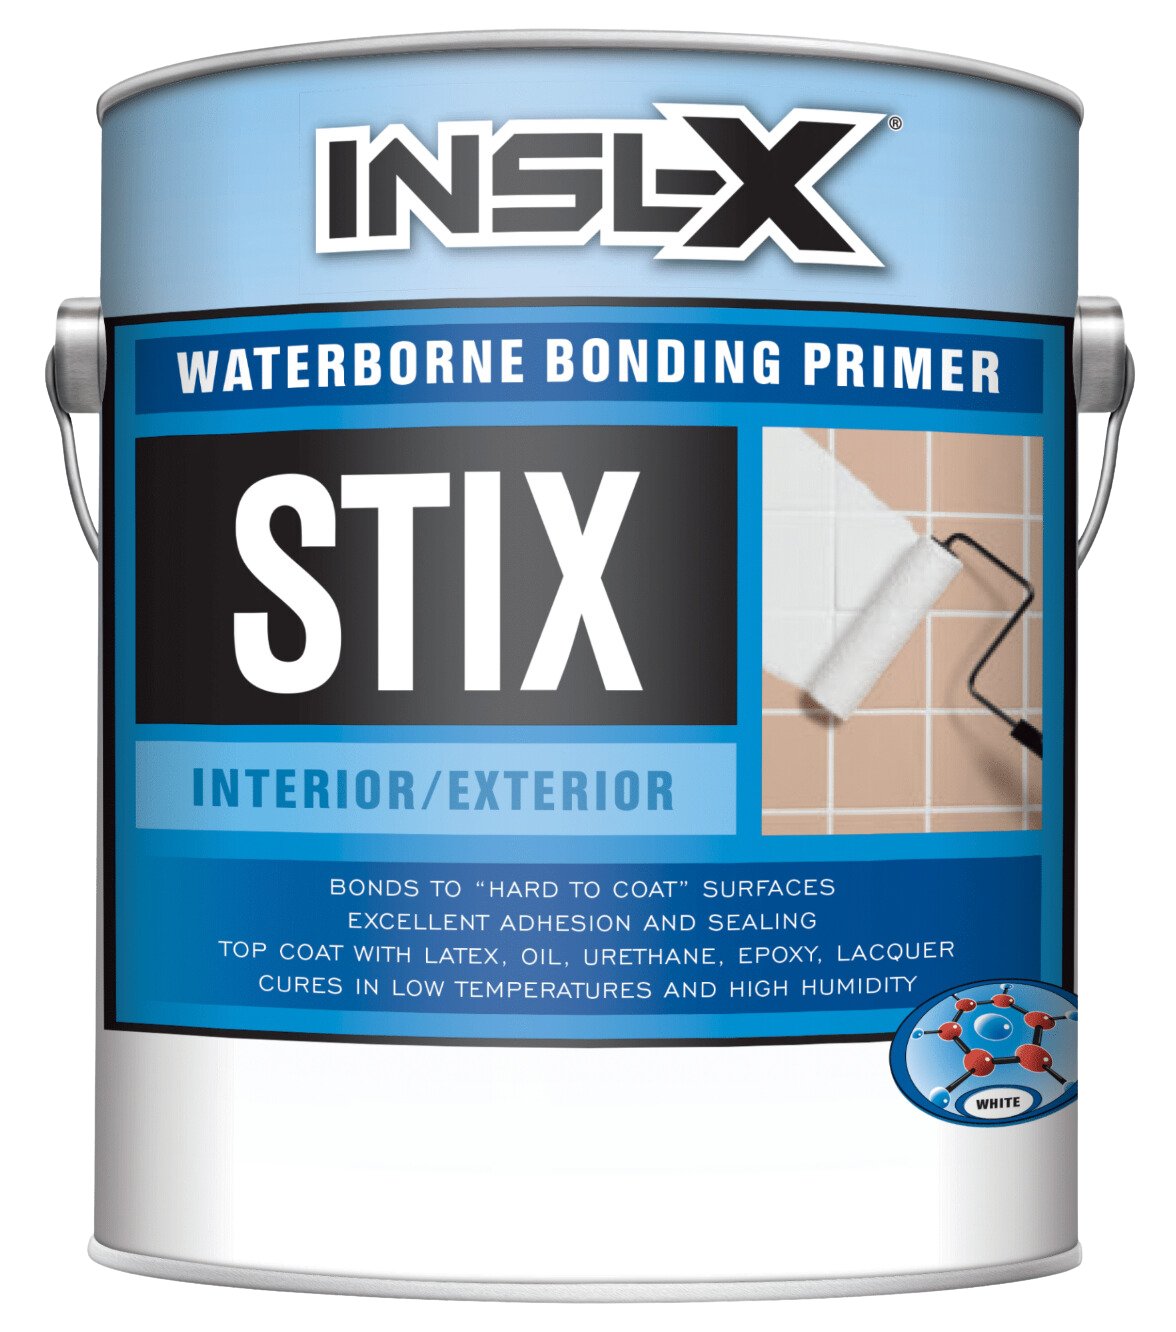
If you can stretch your budget a bit, check out Benjamin Moore INSL-X STIX – it’s seriously impressive! Creates such a strong bond that paint sticks even to glass and plastic. Yes, it costs more, but it’s a game-changer for tricky surfaces. Plus, it works in cold temps and plays nice with pretty much any paint you put on top.
What’s the Best Paint for Tiles?
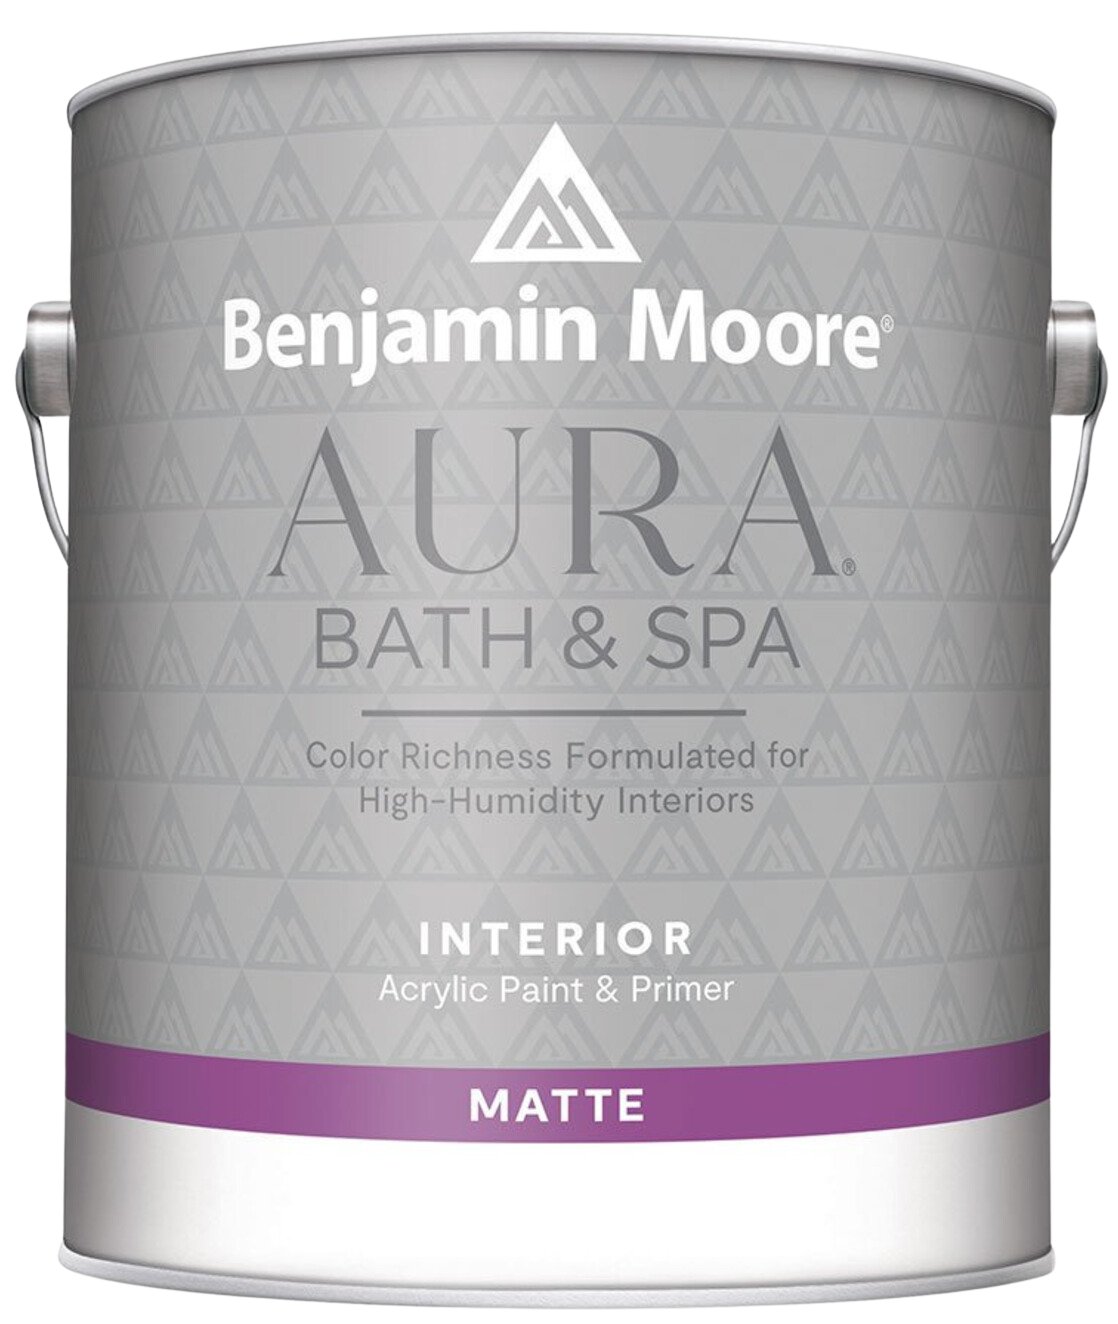
For floor tiles or bathroom walls, I always point people toward Aura Bath & Spa by Benjamin Moore. The matte finish is something else – way different from those old-school glossy bathroom paints.
In bathrooms, moisture resistance is obviously crucial. Aura Bath & Spa handles this like a champ. Their Color Lock technology keeps the color in place – even after tons of cleaning, it stays fresh. No nasty paint smell either – zero VOCs is a nice bonus.
For other spaces, I go with Benjamin Moore’s Advance. It’s perfect if you’re detail-oriented. The way it levels itself out is amazing – it leaves such a smooth finish.
Even though it’s water-based, you get that hard, durable finish you’d expect from alkyd paint. Like its sibling, it’s low in VOCs, even after tinting.
And let me tell you about their Gennex tinting system (used in both paints) – it’s pretty special. Over 3,500 colors to choose from! They use their own special pigments that don’t mess with the paint quality.
Sometimes, I catch myself sitting there with the color fan deck, imagining how different shades would look in a room. It’s kind of addictive! Though maybe that’s just the designer in me talking…
How to Paint Tiles
I know it sounds boring, but success is all in the prep work – it’s about 70% of the entire job.
1) Start by giving everything a deep clean. Old tiles aren’t just covered in visible dirt – they’ve got layers of soap scum, grease, and mineral buildup. A heavy-duty degreaser is your best bet here.
Once that’s done, sand the surface with fine-grit sandpaper (120 grit). This creates tiny scratches that help the paint stick better.
2) Take a good look at the grout between tiles. If you spot any crumbling or cracks, fix it now. Believe me, there’s nothing more frustrating than having to redo your freshly painted tiles because of grout problems.
3) Next up is primer. It acts as a bridge between the tile and the paint. I’ve found that a small roller works best for applying it – it gives you a much smoother finish than a brush. The primer usually takes about two hours to dry, though different brands vary.
4) When it comes to the actual painting, go for two coats. Keep the first coat thin – that’s your foundation. You can go a bit thicker with the second coat. Use a brush for the edges and a roller for the main areas. This way, you won’t end up with obvious brush strokes around the edges.
I’ve used this tile painting technique in several renovations, and it’s always turned out great. Just keep in mind – it’s not a permanent fix. You might get a couple of years out of perfect conditions, but in high-traffic areas like bathroom floors with lots of moisture, expect to see some wear sooner.
Think of it as giving your bathroom or kitchen a facelift. As long as you prep properly and use the right paint for tiles, you’ll get to enjoy your refreshed space until you’re ready for a more permanent update.